Set up and unlock Dosya Vault
Create your encrypted Vault identity, save the one-time recovery key, enter the Vault, and lock or unlock it safely on later visits.
Last reviewed
Vault setup creates the encrypted identity used to open your Vault Spaces. It requires a dedicated passphrase and produces a recovery key that appears once during setup.
Before you start
- Use a trusted device and private browser session.
- Prepare a password manager or secure offline location for the recovery key.
- Choose a unique Vault passphrase you can retain. Your account password cannot replace it.
- Finish setup without screen sharing or recording the recovery-key screen.
Steps: create the Vault identity
- Sign in to Dosya and open Vault.
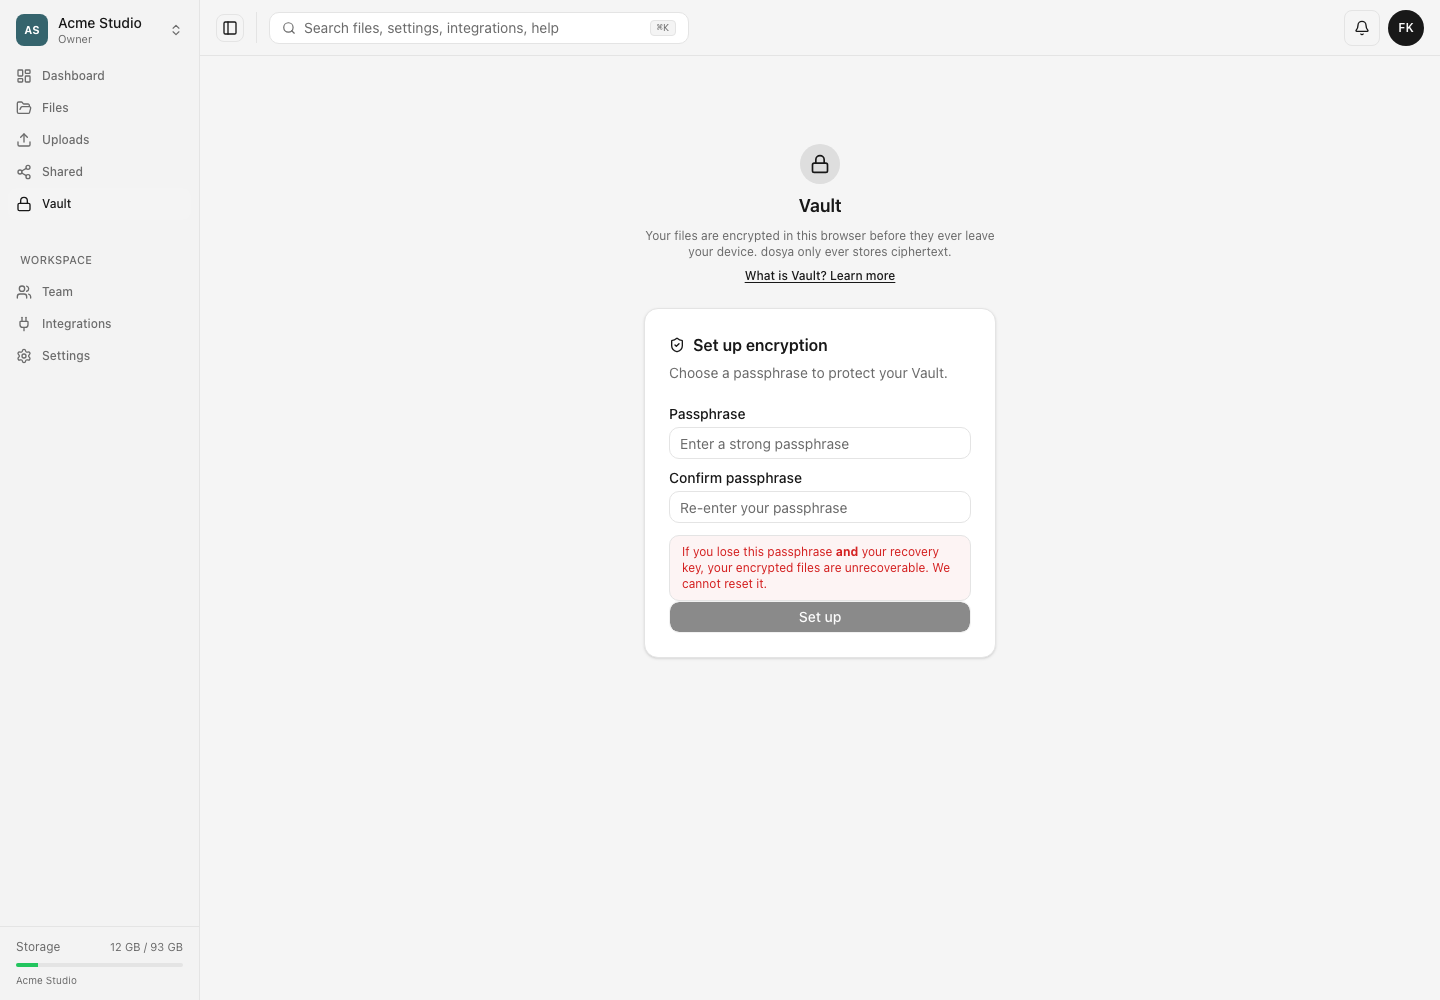
- Select Set up encryption.
- Enter a strong Vault passphrase, then enter it again exactly.
- Read the recovery warning and complete setup.
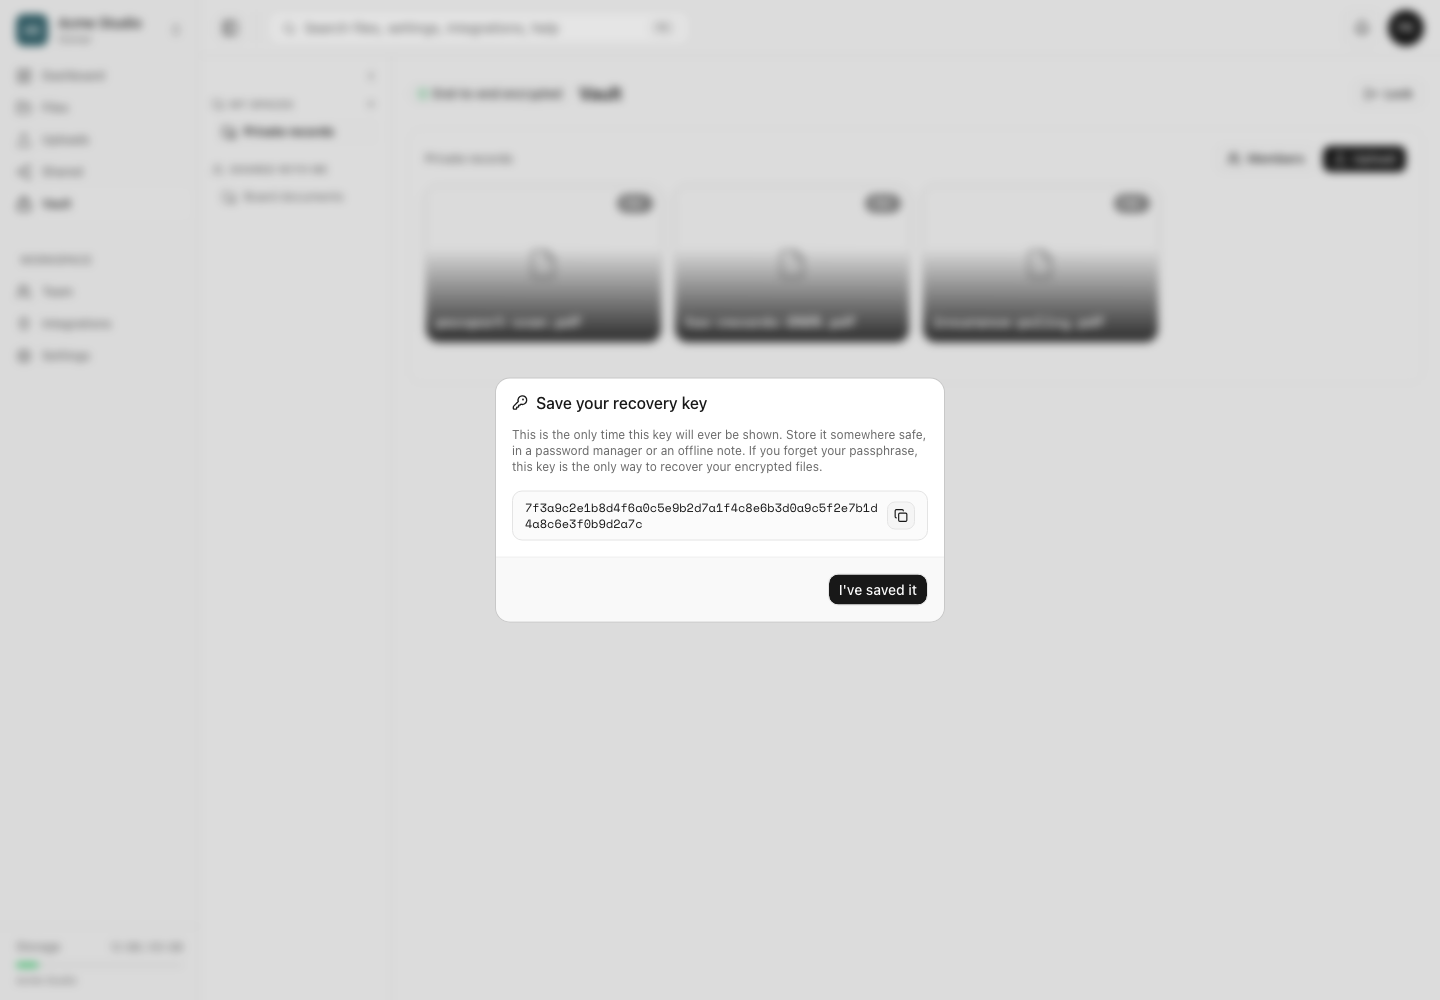
- When Save your recovery key appears, copy the entire key to your password manager or secure offline record.
- Check that the saved copy is complete before selecting I’ve saved it. The setup flow does not show the key again.
Steps: unlock and lock Vault later
- Open Vault while signed in.
- Enter the Vault passphrase and select Unlock.
- Work in the required Space.
- When finished, select the lock control. This clears the active Vault session from memory.
- Enter the passphrase again the next time you need access.
Expected result
After setup or unlock, Vault shows My Spaces and any Shared with me Spaces available to your account. Locking returns you to the unlock screen without deleting encrypted data.
Limits and precautions
- The recovery key is shown once. Dosya does not provide a later “show key” screen.
- Losing both the Vault passphrase and recovery key makes the existing encrypted files unreadable.
- Browser password autofill may not distinguish your account password from the Vault passphrase. Check the value before submitting.
- The active keys are held for the unlocked browser session. Lock Vault before another person uses the device.
Troubleshooting
The two passphrase fields do not match. Re-enter both values carefully. Check keyboard layout, capitalization and password-manager suggestions.
The saved recovery key looks incomplete. Do not close the one-time dialog. Copy it again and verify the beginning and end in the secure destination.
The passphrase does not unlock Vault. Confirm you are using the Vault passphrase, not the Dosya sign-in password. If it is lost, switch to recovery-key unlock.
Vault locks after a reload or new session. Unlock it again. Keys are not kept as a reusable secret in ordinary browser storage.
Related guides
Was this helpful?
Loading helpfulness results…
Voting saves a necessary ballot cookie for up to 180 days so you can change your answer.
Questions and replies
Ask about the steps in this guide. Questions are reviewed before publication.
Keep account details, credentials and private files out of public questions. Use private support for those.
Loading questions…
Sign in to your Dosya account to ask a question.