Receiving files from clients with a file request
Create a request link, choose its destination and upload rules, and check that a client's files arrive in your workspace.
Last reviewed
Open File requests, select New request, then choose By link in Request files. Set the upload destination and any restrictions, generate the URL, and send it to your client. They can upload through the public request page without a Dosya account.
A file request receives files. A sharing link gives access to files you already have; use Creating a sharing link for that task.
Before you start
- Sign in and select the workspace that should receive the delivery. You need permission to create requests, and the receiving workspace needs available storage.
- Choose an accessible destination folder. A missing, hidden or fully locked destination can prevent request creation.
- Decide what to ask for, when uploads should stop, and whether to limit file extensions, individual size or total file count.
- Prepare a small, non-confidential sample for checking the recipient experience. Test uploads count toward Max files.
Steps: create the request
- Open File requests. Find File requests in the app and select New request. An empty list also offers Create a request. Both open Request files.
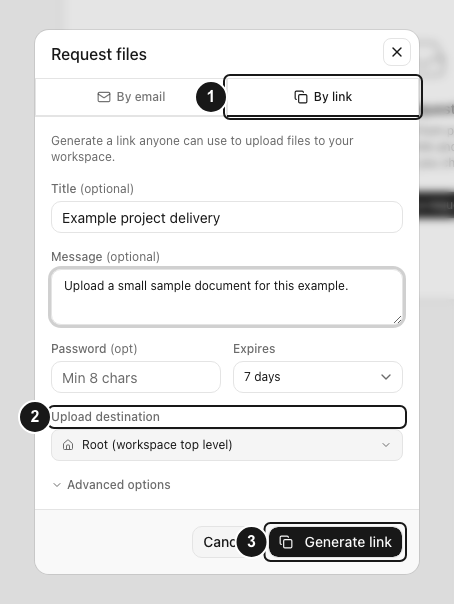
- Choose By link. Select By link beneath the dialog heading. This workflow provides a URL to copy.
- Describe the delivery. Enter Title (optional) and Message (optional). Tell the client what to send; omit account credentials.
- Set password and expiry. Password (opt) is optional and requires at least eight characters after surrounding whitespace is trimmed. Expires starts at 7 days and offers Never, 1 day, 7 days, 30 days and 90 days.
- Choose Upload destination. Select the destination button, which shows Root (workspace top level) when no folder is selected. In Select folder, choose the folder and confirm with Select folder. Check the resulting destination before continuing.
- Set Advanced options. Enter Allowed extensions, such as
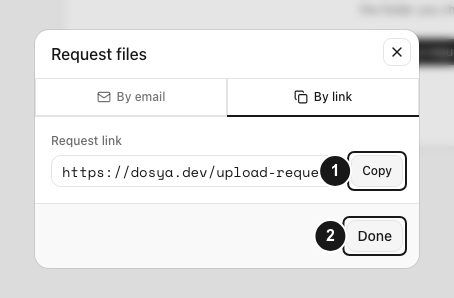
.pdf, .docx, .jpg, if only specific file extensions should be accepted. Max file size (MB) applies to an individual file. Max files sets a request count restriction. Leaving these fields blank adds no restriction from that field; storage and service limits still apply. - Generate and copy. Select Generate link. The dialog displays Request link and Copy. Creation also attempts automatic copying. Select Done to return to the list.
Steps: check the client’s upload experience
- Open the request privately. Paste the URL into a private browser window. Check the request’s title, message and displayed rules.
- Unlock if required. A protected page says This request is locked. Enter the request password in Password and select Unlock. This password belongs to the request, not the client’s account.
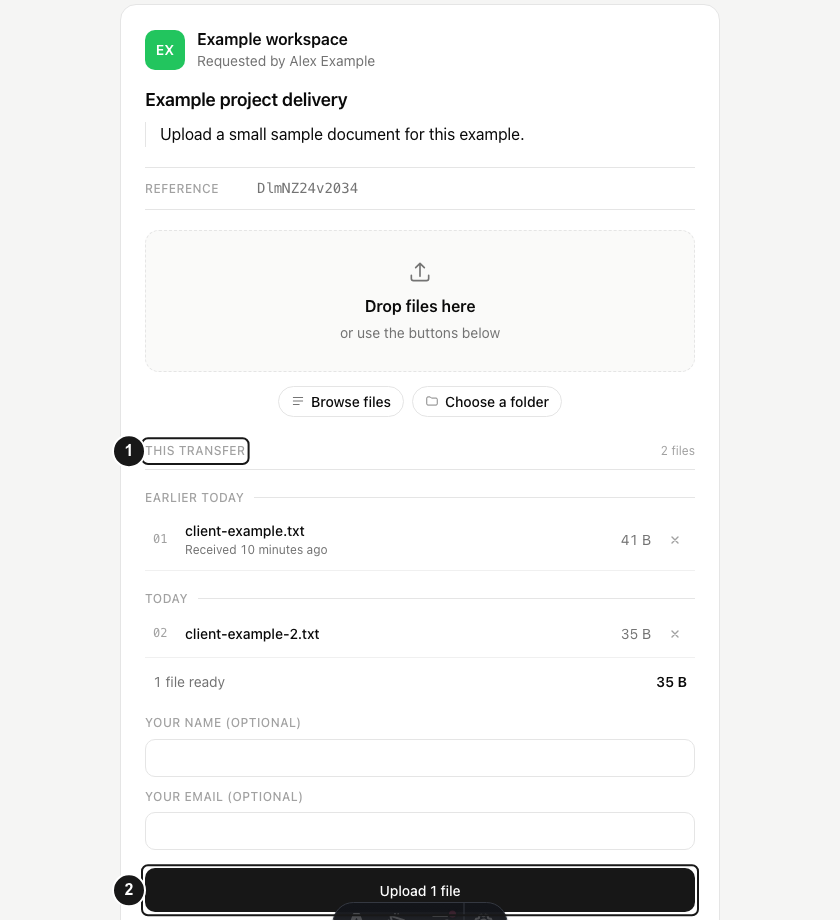
- Choose sample files. On a desktop, use Browse files, Choose a folder or Drop files here. Touch devices offer Photo library, Take a photo and Browse files when available. Selection stages files; it does not finish uploading.
- Review This transfer. Check the staged names and any rule errors. Optionally complete Your name (optional) and Your email (optional). These entries label a submission without verifying identity.
- Start the upload. Select the primary upload button. Its label changes to the selected count, such as Upload 1 file. Keep the page open and watch each row until the transfer reports receipt.
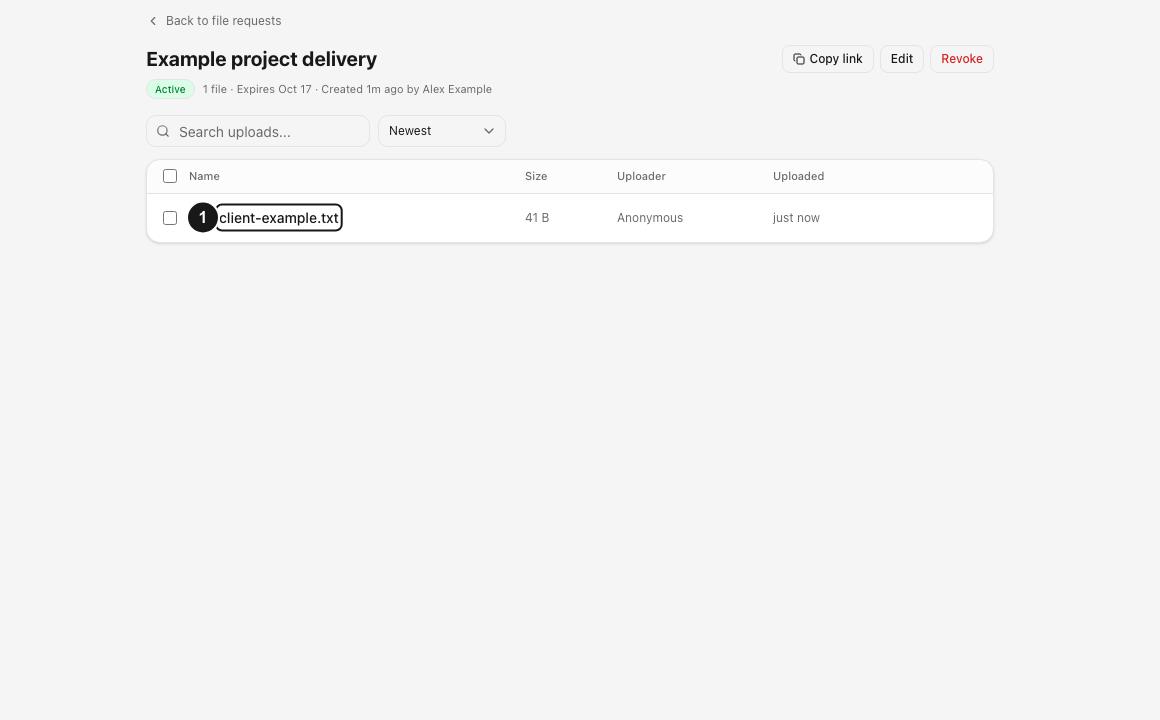
- Confirm receipt in your account. Return to File requests, open the request and check the uploaded-file entries. Check Files in the destination too. Reload an already-open detail page.
Expected result
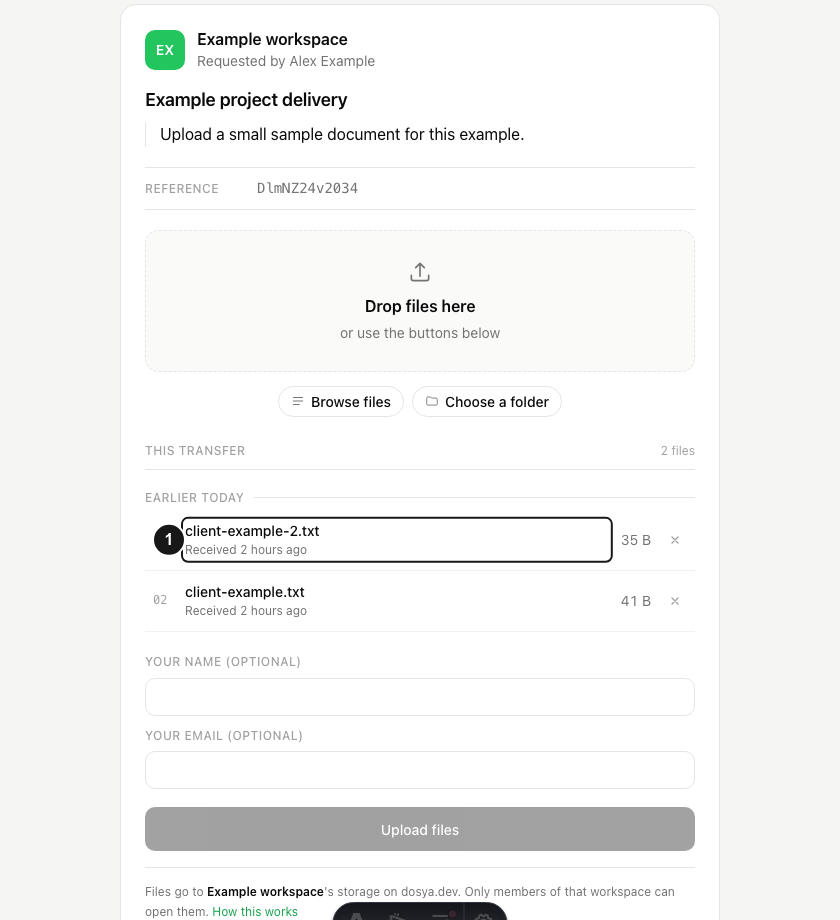
Permitted completed files appear in the request’s uploaded-file list and its selected workspace destination. The public page keeps a transfer record and shows receipt after successful submission. The client does not become a workspace member by uploading.
Send the checked URL and share any request password privately.
Manage the request afterward
Open its detail page to use Copy link, inspect received files, or select Edit to review the request settings. An active request also offers Revoke, which stops further access through its upload link. Revocation is not a substitute for separately managing files already received.
Troubleshooting and limits
For rejected files, check the extension, individual size and remaining count. Renaming an extension does not convert a file into a different format. Ask the requester to adjust a rule only when the intended original file should be accepted.
If the request is unavailable, check expiry and revocation before retrying. If storage is exhausted, the requester must address the receiving workspace’s capacity. Selecting Never expiry or leaving restrictions blank does not remove that storage requirement.
If a transfer fails, read its row’s error and use Retry when offered. If password access expires during a transfer, the page can show Your access timed out with Unlock and continue. Enter the request password there before continuing.
A missing file can mean the sender has only staged it, is still transferring, or encountered an error. Ask them to confirm the receipt, then check the request and destination. Ordinary requests are separate from Vault encryption.
Use private support for persistent errors. Keep confidential URLs and client files out of public comments.
Frequently asked questions
Does my client need a Dosya account?
No. This By link workflow accepts uploads through the public request page, subject to its password, expiry and rules.
Does selecting files send them immediately?
No. The recipient reviews staged files under This transfer, then selects the upload button. Wait for the receipt before treating the delivery as complete.
Does the sender’s entered name prove their identity?
No. Name and email are optional submission details. They should not be treated as verified identity merely because they appear beside a delivery.
Related guides
- Uploading files and folders
- Creating a sharing link
- Watch the existing file request tutorial
- Receiving files from clients discusses broader collection workflows.
Was this helpful?
Loading helpfulness results…
Voting saves a necessary ballot cookie for up to 180 days so you can change your answer.
Questions and replies
Ask about the steps in this guide. Questions are reviewed before publication.
Keep account details, credentials and private files out of public questions. Use private support for those.
Loading questions…
Sign in to your Dosya account to ask a question.