Creating and managing an API key
Generate a key in Profile, choose its permissions and restrictions, save it while it is displayed, and replace or revoke it later.
Last reviewed
Open Profile → API keys, select New API key, name it, and choose what it can do. Review Restrictions and expiry before selecting Generate key, then copy the key while the result dialog is open. The full key is shown only once.
Before you start
- Sign in to the account the integration should use. API keys are managed in your account profile; they can also be restricted to one workspace.
- Check which protocol and permissions your tool needs. Create a separate key for each tool so you can identify and revoke it independently.
- Prepare private credential storage for the key. Do not put it in a public repository, a shared screenshot or a support message.
- If you want a workspace or folder restriction, make sure you belong to that workspace and know which folder the integration should reach.
Steps: generate and save a key
- Find API keys. Open the avatar’s Account menu, select Profile, then select API keys in the profile navigation. You can also open API keys directly.
- Open the form. Select New API key in the strip above the key list.
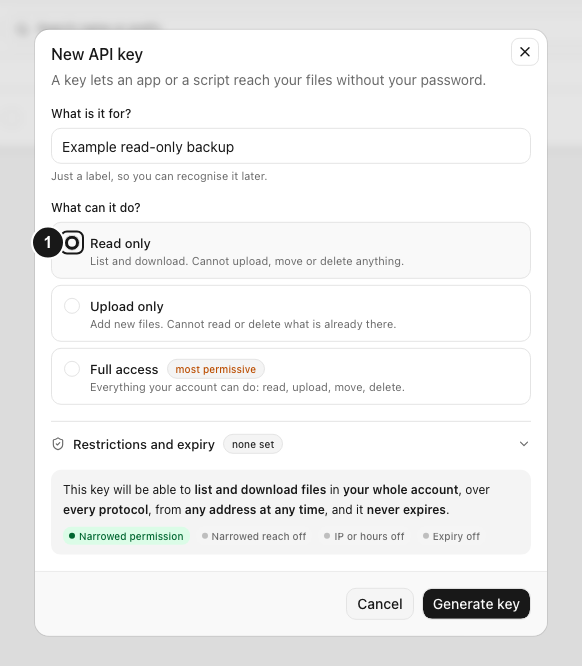
- Name its purpose. In What is it for?, enter a label you will recognize later, such as a tool name and its purpose. The label identifies the key; it is not the credential.
- Choose its permission. Under What can it do?, select Read only, Upload only or Full access. Read only supports listing and downloading. Upload only is for adding new files and does not grant access to read or delete existing files. Full access is the most permissive option. The form initially selects Full access, so make an explicit choice.
- Review restrictions. Open Restrictions and expiry. Follow the options below to limit the key to the intended protocols, workspace, addresses, schedule and usage. A new unrestricted form also starts with Whole account, All protocols and Never expires.
- Read the summary. Check the description at the bottom of the form against the tool’s purpose. Confirm that the reach, permission and expiry are intentional.
- Generate the credential. Select Generate key. If creation succeeds, a dialog headed with the key’s name and is ready displays the full key.
- Save it before closing. Use Copy beside the displayed key and store it privately, then enter it into your tool’s credential settings. Select Done only after saving it. Closing the dialog removes this opportunity to see the full key.
Choose restrictions that fit your tool
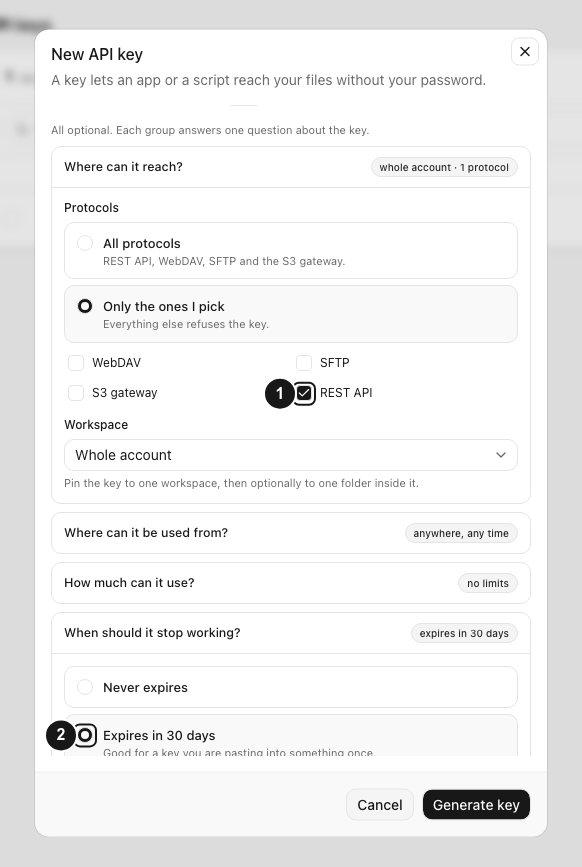
The expanded form groups options by question:
- Where can it reach? Under Protocols, choose All protocols or Only the ones I pick. If you choose the latter, check at least one of REST API, WebDAV, SFTP or S3 gateway. Leaving every box unselected does not create a useful restricted selection. Choose a Workspace to replace Whole account with one workspace. After selecting a workspace, Choose folder… can restrict reach to a folder and its descendants; the picker uses Select folder to confirm.
- Where can it be used from? Add comma-separated addresses or CIDR ranges under Allowed IP ranges, or turn on Only during a weekly window and choose the timezone, days, From and To times.
- How much can it use? Optionally enter Requests / minute, Download / day (GB), Max file size (MB) or Concurrent transfers. Blank fields add no key-specific usage limit; they do not override your plan or other applicable service limits.
- When should it stop working? Choose Never expires, Expires in 30 days or Expires in 90 days.
Two protocol constraints matter before you save: a folder-restricted key can be used only over WebDAV or the S3 gateway, and adding an IP allowlist stops SFTP working with that key. Review the form’s explanations when combining these options.
Expected result
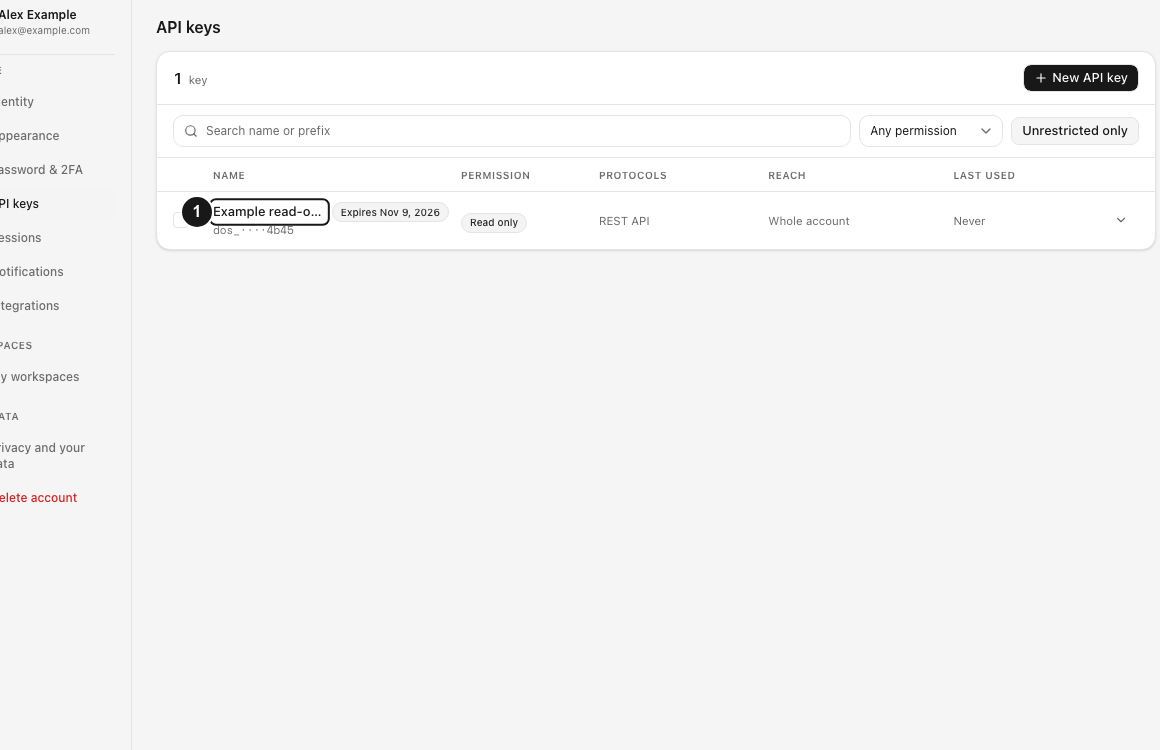
The new key appears in the API keys list. Its row shows Permission, Protocols, Reach and Last used, with expiry information when applicable. The list displays a partial identifier instead of the full credential.
Configure the tool to use the selected protocol and try its intended operation. A key with the wrong permission, reach or access conditions can exist successfully yet be refused for that operation.
Review, replace or revoke a key
Use Search name or prefix and the permission filter to find a key. Open the expand control at the end of its row to see Configuration, Guards and Actions.
Keys cannot be edited after creation. Duplicate settings opens a new-key form with several existing settings filled in. Review the replacement’s settings carefully: its expiry starts at Never expires, and usage limits start blank. Set the intended expiry and limits again before generating it. Generate and save the replacement, update the tool, and then revoke the old credential when appropriate.
To revoke a key, expand its row, select Revoke, check the confirmation dialog, and select Revoke again. This cannot be undone. Tools still using that key will be refused. Multiple row checkboxes also make a Revoke action available for the selected keys.
S3 credentials
An API token and an S3 credential pair are different settings. If the key allows S3 gateway, expand its row and select Enable beside S3 credentials. The resulting dialog provides Access key ID, Secret access key, Endpoint and Region for an S3-compatible client.
Save the secret before selecting Done. Active · show can reopen the other S3 details later, but it cannot retrieve the secret. An expired key cannot be used to enable S3 access, and a key excluding S3 shows Not allowed.
Limitations and troubleshooting
The full API key and the S3 secret are not retrievable later. If either is lost, create replacement credentials and revoke the old key as needed. Copying a partial identifier from the list will not authenticate a tool.
If Generate key fails, check the name and the error message. If you have reached your account’s key limit, remove an unneeded key or review your plan before creating another. Expired keys still appear in the list, so review them when checking your total.
If a tool is refused, check Permission, Protocols, Reach, expiry, IP allowlist and active hours. A folder-restricted key will not work over REST API or SFTP. An SFTP client will not work with an IP-restricted key. Do not resolve these errors by granting broader access before checking the actual requirement.
Use private support for a persistent credential problem. Share the key’s label, selected protocol and error message; omit the full key, authorization headers, S3 secret and generated credential commands.
Frequently asked questions
Can I display the full key again after selecting Done?
No. The full token is shown only at creation. Create a replacement if you did not save it, update the integration, and revoke the unused old key.
Does Duplicate settings preserve every restriction?
No. Review the replacement form: usage limits start blank, and expiry starts at Never expires. Set those options explicitly before generating the replacement.
Does revoking sessions also revoke API keys?
API keys are managed separately. Revoke the key on this page when an integration should stop authenticating. Use Profile → Sessions to review signed-in browsers and apps.
Related guides
Was this helpful?
Loading helpfulness results…
Voting saves a necessary ballot cookie for up to 180 days so you can change your answer.
Questions and replies
Ask about the steps in this guide. Questions are reviewed before publication.
Keep account details, credentials and private files out of public questions. Use private support for those.
Loading questions…
Sign in to your Dosya account to ask a question.